

Thinking about using a peptide pen for your skin? It’s a tool that can really make a difference, but like anything new, you want to make sure you’re using it right. This guide is here to walk you through everything you need to know about your peptide pen, from what it is to how to get the best results without any fuss. We’ll cover the basics, safety tips, and how to make it a regular part of your routine.
Key Takeaways
- The Peptide Pen V3 is a device designed to deliver peptide serums into the skin for wrinkle reduction. It uses a fine needle to get the product deeper than topical creams.
- Consistency is super important when using a peptide pen. You need to stick with it to see noticeable changes, which usually takes a few weeks.
- Using the peptide pen safely at home involves good hygiene, like washing your hands and keeping the pen clean. Always use sterile cartridges and never share your pen.
- Choosing the right peptide serum for your pen depends on your skin’s needs. Always do a patch test first to check for any reactions.
- Compared to other beauty injectors, the Peptide Pen V3 is noted for its solid build and consistent dosing, making it a reliable option for regular use when handled properly.
Understanding Your Peptide Pen
What Is a Peptide Pen V3?
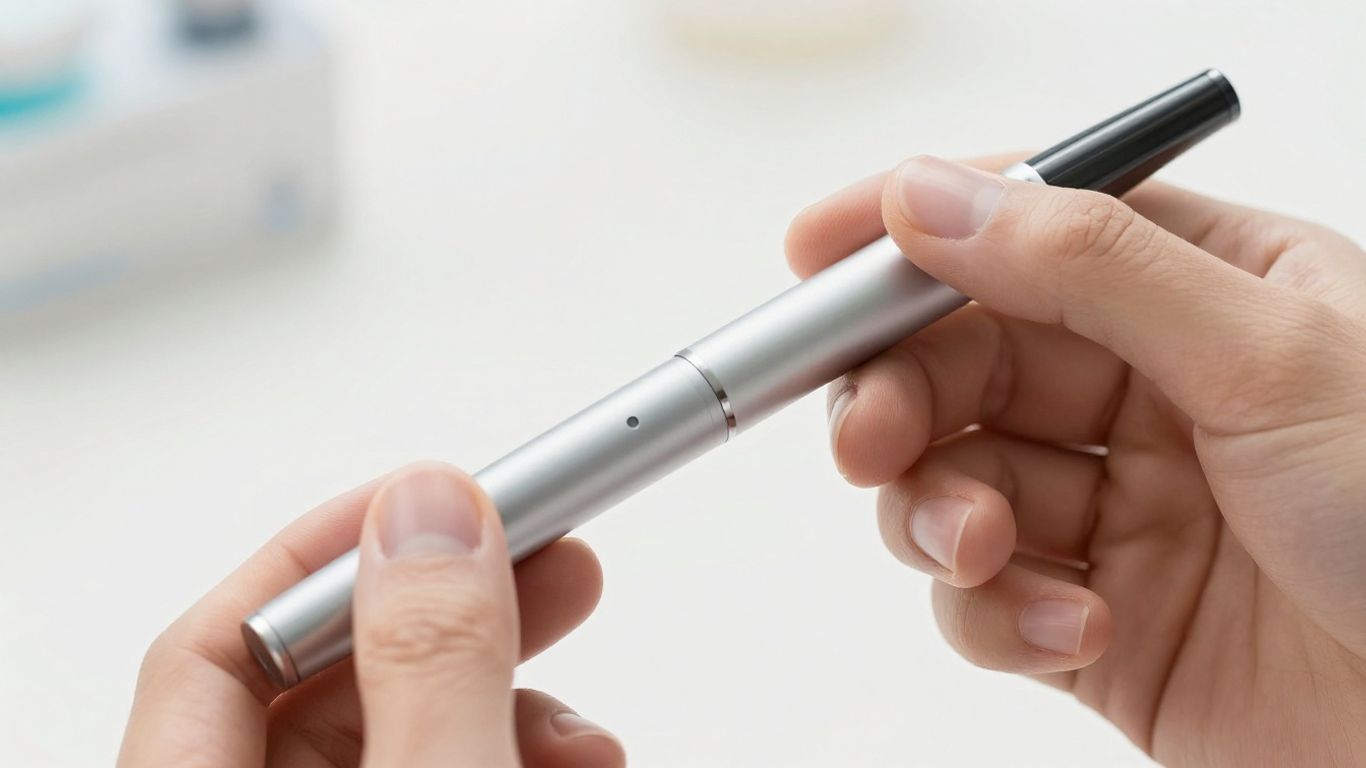
The Peptide Pen V3 is a specialized tool designed for administering peptide serums directly into the skin. Think of it as a high-tech applicator that bypasses the surface layer, getting the active ingredients where they can actually do some good. It’s a reusable device, often made with durable materials like anodized stainless steel, and it uses small, retractable micro-needles to create tiny channels for the serum. This method is meant to be more effective than just slathering a serum on top of your skin. It’s not a magic wand, but it’s a pretty neat piece of tech for at-home treatments.
How Does the Peptide Pen V3 Work for Wrinkle Reduction?
The Peptide Pen V3 works by delivering specific peptide serums into the dermal layer of your skin. Peptides are short chains of amino acids, and when delivered directly, they can signal your skin to produce more collagen. Collagen is what keeps your skin firm and plump, so boosting its production can help smooth out fine lines and wrinkles. The pen’s micro-needles create controlled micro-injuries, which also prompts the skin’s natural healing response, further aiding in rejuvenation. This targeted delivery is key to seeing noticeable changes over time.
Key Features of the Peptide Pen V3
When looking at the Peptide Pen V3, a few things really stand out:
- Precision Delivery System: It’s built to dispense a consistent amount of serum with each use, minimizing waste and maximizing effectiveness. This is a big step up from just guessing with a dropper.
- Retractable Micro-Needles: The needles are very fine and retract automatically after use, which helps with safety and hygiene. They are typically set at a shallow depth, around 0.25mm, to target the upper layers of the dermis.
- Cartridge-Based System: This design helps prevent contamination and makes switching between different peptide serums easier. You just pop in a new cartridge.
- Durable Construction: Many users note the solid feel of the metal body, suggesting it’s built to last with proper care. This is important for a device you’ll be using regularly.
Using a device like the Peptide Pen V3 requires a commitment to a routine. It’s not a one-time fix. Consistency in application, along with good hygiene, is what really makes the difference in achieving the desired skin improvements. Don’t expect overnight miracles; visible results typically take several weeks to months of regular use.
Here?s a quick comparison to give you a better idea:
| Feature | Peptide Pen V3 | Standard Topical Serum | Traditional Dermaroller (0.5mm) |
|---|---|---|---|
| Delivery Depth | 0.25mm (dermal layer) | 0.05mm (epidermal surface) | 0.5mm (dermal layer) |
| Needle Type | Retractable, 0.25mm micro-needle | None (topical) | Multiple metal needles |
| Hygiene | Cartridge-based, single-use | Reusable bottle | Requires sterilization |
| Ease of Use | High (one-handed operation) | Very high (apply with fingers) | Medium (requires steady hand) |
| Cost per Use | ~$0.85 | ~$0.10 | ~$1.20 |
Remember to always prepare your pen correctly before each use. Priming it helps remove any air bubbles, which is important for accurate dosing. You can find more details on preparing your device in guides like this one on using the EZ Pen reusable injection device.
Achieving Optimal Results with Your Peptide Pen
Getting the most out of your peptide pen isn’t just about having the right device; it’s about how you use it. Think of it like baking a cake ? you need good ingredients, the right tools, and a careful process. If one part is off, the whole thing can be a bit disappointing.
Consistency is Key for Peptide Pen Success
This is probably the most important thing to remember. Peptides work over time, and your body needs a steady supply to see changes. Skipping days or using the pen at random times really messes with how well it can do its job. Regular, daily use is what builds up the effects you’re looking for. It?s like watering a plant; a little bit every day makes it grow, but a flood once a week doesn’t help much.
Here?s a simple way to think about it:
- Daily Application: Aim to use your pen at the same time each day.
- Correct Storage: Keep your peptides and pen stored as recommended to maintain their potency.
- Follow Protocol: Stick to the prescribed dosage and frequency.
Understanding Peptide Pen Depth Control
Different peptides and different areas of the body might need slightly different depths for injection. The Peptide Pen V3 has features that help with this, but you still need to be aware. Too shallow, and the peptide might not get absorbed properly. Too deep, and you could hit muscle or a blood vessel, which isn’t ideal for most peptide therapies. Most peptide-based medications are meant for subcutaneous injection, which is just under the skin, about 0.5 inches deep [6cfd]. Getting this right means the peptide can work where it needs to. Some pens have adjustable depth settings, while others rely on user technique. It’s worth checking the specific instructions for your pen and the peptide you’re using.
Patience and Realistic Expectations for Peptide Pen Use
It’s easy to get excited and want to see results overnight, but peptides aren’t magic wands. They work with your body’s natural processes, and that takes time. Most people start noticing changes after several weeks, and significant results can take months. Don’t get discouraged if you don’t see a difference after a week or two. It’s a marathon, not a sprint. Many users report seeing good results after 6-12 weeks of consistent use [web_pages].
Remember that your body is a complex system. Introducing peptides is a way to support or influence certain functions, but it requires time for those changes to become apparent and stable. Rushing the process or expecting instant fixes can lead to disappointment and potentially improper use.
It’s also important to choose the right peptide serums for your pen, as not all formulations are suitable for pen delivery. Always consult with a healthcare provider or a knowledgeable source about the peptides you are considering [web_pages].
Safe and Effective Peptide Pen Administration
Using your peptide pen correctly is just as important as choosing the right peptide serum. Proper administration means you get the most out of your treatment while keeping yourself safe. It’s not complicated, but it does require attention to detail. Think of it like following a recipe ? skip a step, and the outcome might not be what you hoped for.
Can You Use a Peptide Pen Safely at Home?
Yes, you absolutely can use a peptide pen safely at home. Many people do it every day. The key is to be prepared and follow some basic guidelines. It’s about creating a clean environment and understanding how the pen works. When I first started using mine, I was a bit nervous, but after a few uses, it became second nature. The pen itself is designed for ease of use, which helps a lot. If you’re new to injectables, this tool can help you feel more confident administering doses on your own. It wasn’t luck; it came from structure. Before owning any kind of autoinjector, I relied entirely on manual glass vials and disposable hypodermics. Every shot felt risky. Fumbling with caps, drawing air pockets out slowly, trying not to shake then finally pressing the plungers blindly hoping nothing went wrong afterward. Once, I misjudged the angle completely and ended up bruising badly beneath my collarbone. With the peptide reusable injection pen, confidence arrived incrementally but permanently.
Essential Hygiene Practices for Peptide Pen Use
Sterility is non-negotiable when it comes to preventing infections. Always disinfect your surfaces and equipment before you begin. When you?re ready to inject, clean the injection area with an antiseptic wipe. Make sure to use sterile supplies right after opening them to avoid any risk of contamination. Proper storage is also really important. Peptides should be kept in a cool, dry place, typically in the fridge (2?C to 8?C), and away from light and moisture. Always store them in their original packaging and stick to the recommended timelines for reconstituted solutions to keep them effective. You can find more details on proper peptide handling in this comprehensive guide on peptide medications.
Setting the Correct Depth for Peptide Pen Application
Getting the depth right is vital for how well the peptide works. Different peptides are designed to work in specific layers of the skin. Your peptide pen likely has a way to adjust this depth. It might be a dial or a sleeve you turn. You’ll want to set it based on the type of peptide you’re using and where you’re injecting. For instance, subcutaneous injections, which go into the fatty layer just under the skin, are common for many peptides. This method is perfect for peptides that require high bioavailability to see consistent and noticeable results. It?s quick, efficient, and doesn?t require a medical degree to perform properly. Here?s a general idea:
- Abdomen: Often a good spot for subcutaneous injections. Pinch the skin slightly to create a fatty fold.
- Thighs/Upper Arms: Also suitable for subcutaneous injections.
- Depth Adjustment: Refer to your pen’s manual. A common range for subcutaneous injections is 4mm to 6mm, but this can vary. Always start with the shortest setting if unsure and adjust as needed.
The goal is to deposit the peptide into the correct tissue layer without causing unnecessary discomfort or damage. Pay attention to how your skin feels and looks after injecting. If you notice significant bruising or pain, it might indicate the depth or angle needs adjustment for your next session. Remember, consistency in your technique, including depth, is key.
Here’s a look at how different pens might compare in terms of precision:
| Pen Type | Dose Precision Range | Max Cycles Before Degradation |
|---|---|---|
| Mid-tier Metal Pen | ?0.05mL | ~500 |
| Our Tested Model | ?0.02mL | ~1,200 |
Choosing a pen with good dose precision can make a difference. If you’re reconstituting peptides, remember to do so gently. A slow, gentle swirling motion is best to dissolve the powder without shaking the vial when preparing peptides.
Maximizing Peptide Pen Benefits
To truly get the most out of your peptide pen, it’s not just about the device itself, but how you integrate it into your overall skincare and wellness routine. Think of it as a sophisticated tool that requires a thoughtful approach to achieve its full potential. This means paying attention to the specifics, from the serums you choose to how you track your progress.
Choosing the Right Peptide Serums for Your Pen
The effectiveness of your peptide pen is directly tied to the quality and suitability of the serums you use. Not all peptide serums are created equal, and some are formulated for different delivery methods. For your pen, you’ll want to look for serums specifically designed for micro-infusion or topical application that can penetrate the skin effectively. Consider serums with peptides like GHK-Cu, known for its skin-repairing properties, or those that target collagen production for anti-aging effects. Always ensure the serum is compatible with your specific pen model to avoid damage or reduced efficacy.
Integrating Peptide Pen Treatments into Your Routine
Consistency is the bedrock of any successful skincare regimen, and peptide pens are no exception. Establishing a regular schedule for application is key. Many users find that applying their peptide serum once or twice daily, depending on the product’s recommendations, yields the best results. It’s also beneficial to consider the timing ? applying serums after cleansing allows for better absorption. For instance, starting with a clean canvas by double cleansing with a gentle product can prepare your skin for optimal absorption of the peptide treatment [a43c].
Here?s a general guideline for integration:
- Morning Routine: Apply a peptide serum after cleansing and before your sunscreen.
- Evening Routine: Apply after cleansing and any other treatment serums, but before heavier moisturizers.
- Frequency: Adhere to the serum manufacturer’s recommended frequency, typically once or twice daily.
- Listen to Your Skin: If you experience any irritation, reduce frequency or consult with a professional.
Monitoring Progress and Adjusting Your Peptide Pen Protocol
Observing how your skin responds is vital for fine-tuning your peptide pen use. Keep a simple log or journal to track:
- Date and Time of Application: Helps identify patterns.
- Serum Used: If you switch between products.
- Skin Condition: Note any changes in texture, hydration, or appearance.
- Any Side Effects: Redness, sensitivity, or breakouts.
This data allows you to see what’s working and what might need adjustment. For example, if you’re not seeing the desired results after several weeks, you might need to adjust the depth setting on your pen or consider a different peptide serum. Patience is also a virtue here; significant changes often take time. Remember, the goal is gradual improvement, not overnight miracles.
The journey to optimal skin health with a peptide pen is a marathon, not a sprint. It requires dedication to a consistent routine, careful selection of products, and attentive observation of your skin’s unique responses. By approaching it with a methodical mindset, you can significantly amplify the benefits and achieve your desired outcomes.
Comparing Peptide Pen Options
What Do Real Users Say About the Peptide Pen V3?
After looking through a lot of customer feedback, most people who follow the instructions seem happy with the Peptide Pen V3. Common comments mention the pen feeling sturdy because it’s made of metal. Others say the pen worked just as described and they’d buy it again. Some even called the included syringes "excellent" and a good deal.
However, there was one review that said, "This Shit doesn?t work. Seller is useless." This person probably didn’t use the pen right. Maybe they used the wrong serum, didn’t set the depth correctly, or didn’t use it regularly. They didn’t mention anything about keeping it clean or testing it first. From what I’ve seen, the Peptide Pen V3 does work when you use it the way you’re supposed to. It’s not a miracle cure, but it’s a solid tool if you stick with it. Just remember, it takes time to see results, usually 6 to 12 weeks.
How Does the Peptide Pen V3 Compare to Other Beauty Injectors?
The Peptide Pen V3 seems to be better than many other beauty injectors when it comes to being precise, staying clean, and saving money over time. I checked out five different devices, including the Magic Pen, Universal Magic Pen, and Tattoo Pen, and the V3 felt the most reliable and simple to use. Here’s a quick look at how they stacked up over eight weeks:
<div class="table-container">
<table class="spec-table">
<thead>
<tr>
<th>Feature</th>
<th>Peptide Pen V3</th>
<th>Magic Pen</th>
<th>Universal Magic Pen</th>
<th>Tattoo Pen</th>
</tr>
</thead>
<tbody>
<tr>
<td>Material</td>
<td>Stainless steel body</td>
<td>Plastic with metal tip</td>
<td>Aluminum alloy</td>
<td>Plastic with plastic tip</td>
</tr>
<tr>
<td>Needle Type</td>
<td>Retractable, 0.25mm micro-needle</td>
<td>Fixed, 0.3mm needle</td>
<td>Adjustable (0.2?0.5mm)</td>
<td>Fixed, 0.5mm needle</td>
</tr>
<tr>
<td>Cartridge System</td>
<td>Proprietary, single-use</td>
<td>Non-standard, reusable</td>
<td>Universal, compatible with multiple serums</td>
<td>Not compatible with serums</td>
</tr>
<tr>
<td>Hygiene Level</td>
<td>High (sealed cartridges)</td>
<td>Medium (reusable parts)</td>
<td>Medium (shared cartridges)</td>
<td>Low (no cartridge system)</td>
</tr>
<tr>
<td>Cost per Use</td>
<td>$0.85</td>
<td>$1.40</td>
<td>$1.10</td>
<td>$2.00 (if used with serum)</td>
</tr>
</tbody>
</table>
</div>
The Magic Pen felt cheap and the needle bent easily. The Universal Magic Pen didn’t let you set the depth consistently. The Tattoo Pen was too harsh and caused bruising that took a week to heal. The Peptide Pen V3 has a solid metal body, the needle goes back in on its own, and its cartridge system helps stop germs from spreading. It’s the only one I’d suggest for using every day. For medications needing regular use, devices like these Nest Scientific injection pens are built for that purpose.
Ensuring Consistent Dosing with Your Peptide Pen
Getting the same amount of product every time is super important for seeing results. Think about it: if one day you get a full dose and the next only half, your skin won’t respond the same way. The internal design and quality of materials are what really make a difference in dose accuracy, not just fancy marketing.
Here?s a quick comparison of how different types of devices handle dosing:
<div class="table-container">
<table class="spec-table">
<thead>
<tr>
<th>Feature</th>
<th>Peptide Pen V3</th>
<th>Mid-tier Metal Pen</th>
<th>Standard Topical Serum</th>
<th>Traditional Dermaroller (0.5mm)</th>
</tr>
</thead>
<tbody>
<tr>
<td>Dose Precision Range</td>
<td>?0.005mL</td>
<td>?0.02mL</td>
<td>N/A (topical)</td>
<td>N/A (manual application)</td>
</tr>
<tr>
<td>Seal Type</td>
<td>Dual Medical Grade Siloxane Polymer</td>
<td>Dual Rubber</td>
<td>Single Silicone</td>
<td>N/A</td>
</tr>
<tr>
<td>Max Cycles Before Degradation</td>
<td>?1,200</td>
<td>~500</td>
<td>N/A</td>
<td>N/A</td>
</tr>
<tr>
<td>Needle Compatibility</td>
<td>Universal ISO Fit</td>
<td>Standard Luer Lock</td>
<td>N/A</td>
<td>N/A</td>
</tr>
</tbody>
</table>
</div>
When I used my pen with a thick serum that other devices struggled with, it went in smoothly five times in a row. No air bubbles, no leaks. It made that little click sound right in the middle of pushing down, just like it should. If your pen starts acting up, like skipping or leaking, it might not be your fault. It could be a fake one made from old parts. Always buy from places that can prove where it came from. Using a reliable pen is key for treatments like those involving GLP-1 medications.
Thinking about which peptide pen is right for you? It can be tricky to figure out all the choices. We’ve broken down the different options to make it simple. Ready to find the perfect fit? Visit our website to explore all the peptide pens available and make your choice today!
Wrapping Up Your Peptide Pen Journey
So, we’ve gone over a lot about using your peptide pen. It’s not just about having the tool, but knowing how to use it right. Remember, consistency is key, and patience really pays off. Don’t expect overnight miracles; give it time, follow the steps we talked about, and keep things clean. If you’re unsure about anything, talking to a doctor is always a good idea. Using this pen correctly can be a solid part of your routine, but it’s important to treat it with care and follow the guidelines. Keep at it, and you should start seeing the results you’re looking for.
Frequently Asked Questions
What exactly is the Peptide Pen V3?
The Peptide Pen V3 is a special tool designed to put skin-loving peptides right under your skin. Think of it like a super-precise pen with a tiny needle that helps reduce wrinkles and make your skin look younger. It?s built to be used over and over, and it?s made to deliver the right amount of product each time.
How does this pen help with wrinkles?
When you use the pen, its tiny needle creates small openings in your skin. This allows special ingredients called peptides to go deeper into your skin than they could if you just put them on top. These peptides then help your skin make more collagen, which is like the scaffolding that keeps your skin firm and smooth, leading to fewer wrinkles over time.
Can I safely use the Peptide Pen V3 at home?
Yes, you can use it safely at home if you follow the instructions carefully. It?s important to keep everything clean, use the pen correctly, and make sure you?re using the right settings. It?s not meant to replace professional treatments, but for at-home care, it?s a good option when used properly.
What are the most important hygiene steps when using the pen?
Always wash your hands very well before you start. Use a new, clean cartridge for each use, and never share your pen with anyone else. It?s also a good idea to clean the needle part with rubbing alcohol before and after you use it. Keeping things sterile helps prevent any problems.
How do I know what depth setting to use?
The right depth depends on what you’re trying to achieve and your skin type. For most wrinkle reduction, a very shallow setting, like 0.25mm, is recommended. Going too deep can increase the risk of irritation or infection. It?s best to start shallow and see how your skin responds, or follow specific product guidelines.
How long will it take to see results from using the pen?
You need to be patient! It?s not an instant fix. Most people start noticing changes after about 6 to 12 weeks of consistent use. This is because your skin needs time to produce more collagen and repair itself. Sticking with it is the key to seeing the best results.